
Tree Planting Guide

A tree is most vulnerable during its first few years after transplant. Support your young tree’s health and survival with proper planting and care.
Handle with Care
Roots are delicate…
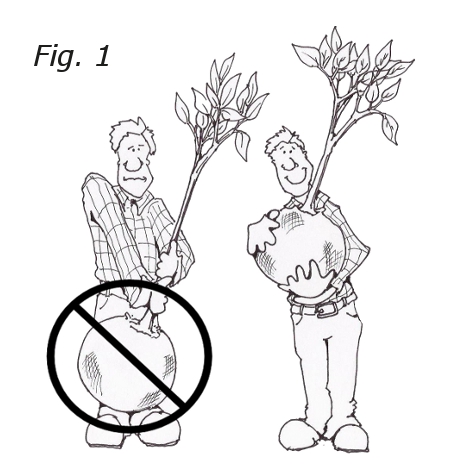
1 . Always lift trees in Containers or with Balled & Burlapped (B&B) rootballs by the container or ball, never by the trunk. (see Fig. 1 or images below)
2. Always set your tree down gently. Dropping a tree’s rootball onto the ground can result in severe damage to the fine roots.
Please note: During transport, go slow – keep it 30mph. Plant your tree ASAP! If you can’t plant it immediately, store it in a cool place and keep the roots moist until planting, DO NOT let the roots dry out.
Plant the Tree
1. Dig a hole… (Fig. 2)
- at least twice as wide as the tree’s roots to encourage the root system to spread out.
- about the same depth as the tree’s rootball — slightly shallower.

Getting the Depth Right
Planting a tree at the right depth is critical for its health and survival. Many trees are planted too deep, preventing their roots from receiving adequate oxygen.
To plant your tree at the right depth…
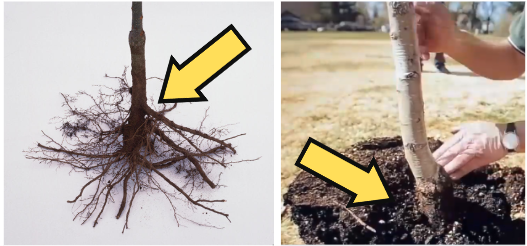
- Find the root flare – the area of the trunk that flares out to meet the topmost roots
- Make sure that the root flare sits above ground when the hole is filled with soil (see below images)
- For B&B and Container trees, you may need to gently remove soil on the top of the rootball to expose the root flare.
- As you dig, remove grass for use elsewhere after knocking off soil.
Pro Tips:
- Water the area a day ahead of planting for easier digging.
- Use a tarp to pile up soil and sod for easy backfill & cleanup.
- Hole should be saucer shaped with sloping sides. Roughen up the sides of the hole to help roots grow into the surrounding soil.
- Lay a shovel across the hole to mark the level of surrounding grade & double check your depth.
2. Work with a partner. Remove all twine, stakes and tags from the tree’s branches. Have a hose or a water bucket ready.
3. Gently place your tree in the center of the hole. If your tree leans to one side, tip the tree to the opposite side and add a little soil under the rootball to adjust its resting place.
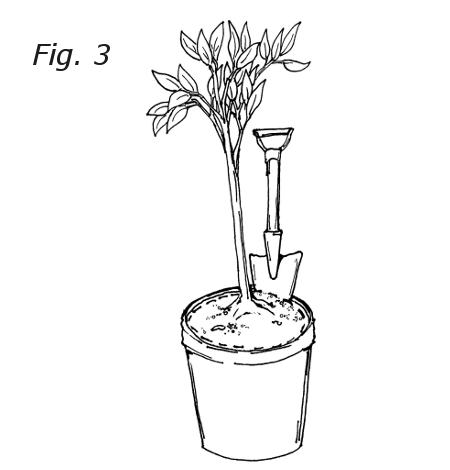
If the tree is in a Container, (Fig. 3) the root system needs to be “shaved” to grow properly. With the tree still in the container, match your curved shovel blade to the curve of the container about a half inch in from the edge. Swiftly thrust straight down, cutting off the outer half inch of the root system. This will prevent circling roots from girdling, or strangling, the tree. Gently place the tree on its side at the edge of the hole. One person supports the trunk while another pulls the container straight back. Remove the container and carefully slide the tree and rootball into position. Check the depth (the root flare should be 1″ above grade) and make adjustments to correct any leaning. To correct any leaning: tip tree to the opposite side and tuck soil under the root ball.
If the tree is Balled & Burlapped, gently place the tree in the hole. Check your depth (the root flare should be 1″ above grade) and correct any leaning. To correct any leaning: tip tree to the opposite side and tuck soil under the root ball. Remove twine on the rootball and at the base of the trunk. Unwrap, fold down, and cut away excess burlap. It is fine to leave some burlap underneath the tree; attempting to remove it may result in unnecessary damage to the roots.
Note: If the rootball has a wire basket, once in the hole, use wire cutters to remove as much of the wire as possible without disturbing the rootball (ideally at least the top 2/3rds of the wire basket).
If the tree has bare roots, place a small mound of soil at the center of hole. Hold the tree 2 inches above the target depth while filling the hole with soil until the tree is stable. Water 2-3x as you backfill. The soil and tree will settle and sink.
4. Backfill, water and mulch with a method…
- Fill the hole half way with soil.
- Add water to settle the soil 2-3x, filling the hole to the top.
- Fill the hole with the rest of the soil after the water has settled.
- Build a donut-shaped berm circling the base of the tree to capture and hold water (Fig. 2). Tamp and press soil gently with hands (not feet!).
- Water thoroughly, filling the basin you’ve created (about 10 gallons).
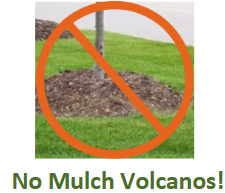
- After the water has soaked in, cover the soil with 3 inches of mulch to maintain moisture and prevent erosion and weed growth (Fig. 2). Keep mulch 3 inches away from trunk.
- Fill the basin with water again and…
Pro Tips:
- When building the berm, flip pieces of sod upside down to prevent grass from re-rooting.
- Do not pile mulch against the trunk, this causes rot and invites pests!
- Put the Tree Care Guide on your fridge.
- Set yourself reminders to check your tree’s moisture & begin your watering schedule.
Congratulations, you’re done!
Learn about proper Tree Care.
Learn about Irrigation Solutions.
Categories
Support us with a Donation
Related Resources

How to care for trees in Denver

